Migrate files across different cloud drives without manually downloading and re-uploading.

Sync two clouds or directories in two different cloud drives via one-way or two-way sync.

Backup one cloud data to another cloud for an extra protection and easy recovery.
Web Distributed Authoring and Versioning (WebDAV) is an extension of the Hypertext Transfer Protocol(HTTP) that allows clients to perform remote Web content authoring operations.
Microsoft Windows 2000, XP, Win7 and IE, Office and Adobe/MacroMedia's DW all support WebDav, which greatly enhances the value and performance of web applications. For users who need to publish a lot of content, WebDav reduces the dependency on CMS systems and allows more freedom of creation. With WebDav, uploading and downloading can become a breeze.
Before starting enabling WebDav protocol on your Synology NAS, you need to:
Note: For information on basic hardware and software settings, please refer to the "Hardware Installation Guide" for Synology products. It’s available from the download center.
Before accessing files on your Synology NAS, you have to enable WebDav on your Synology NAS first.
Step 1. Sign in to DSM with an account, which belong to the administrators group.
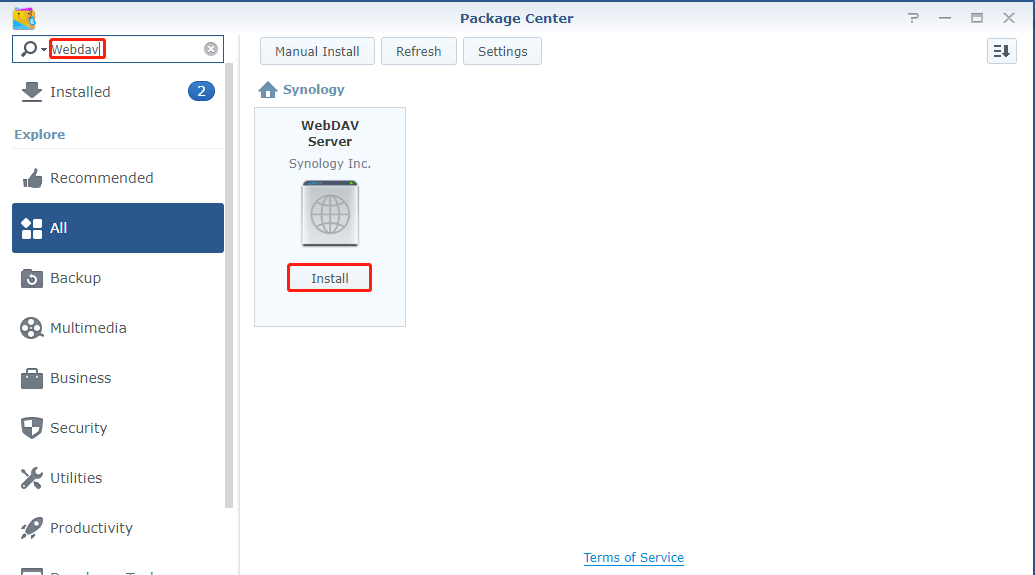
Step 2. Click on Package Center on your desktop and search WebDav through the
Search Box to install it on your Synology NAS.
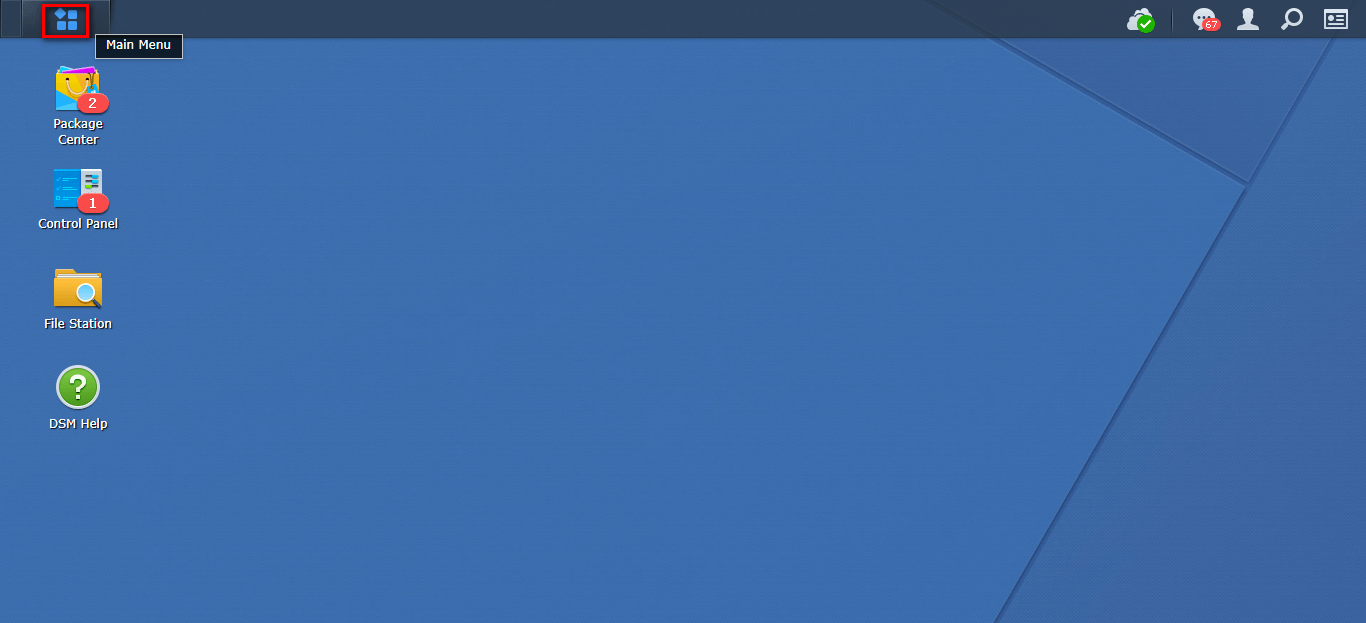
Step 3. After the installation process is complete, click on the Main Menu option in the upper left corner of the interface.
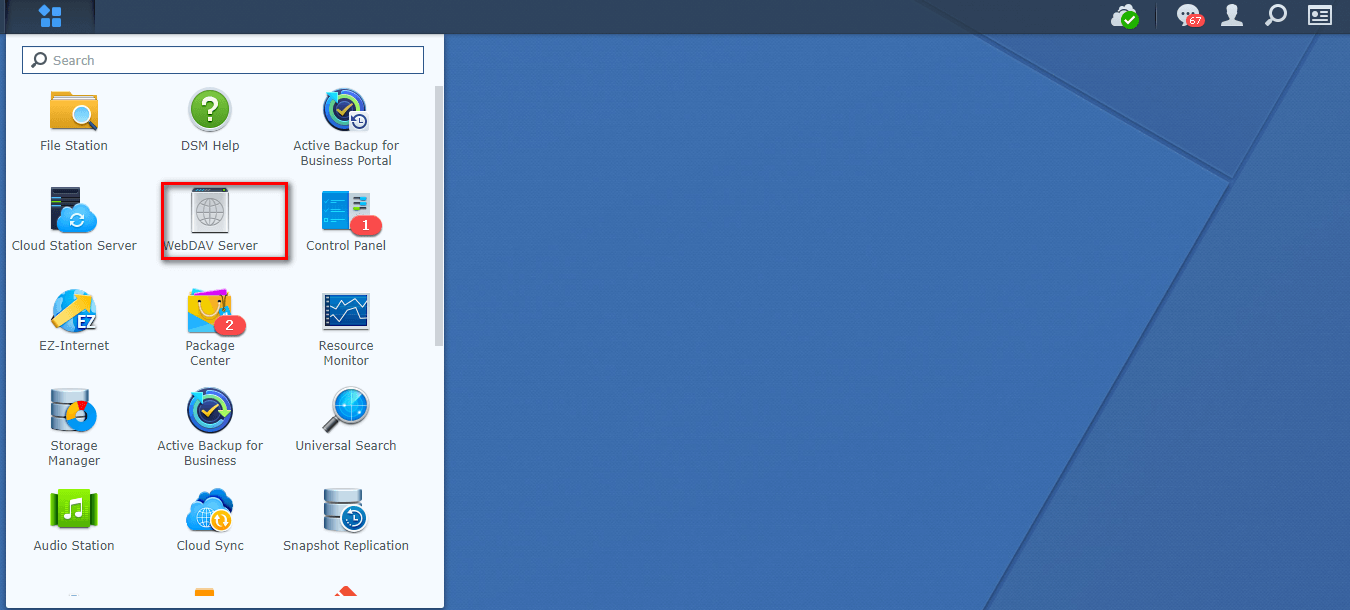
Step 4. Launch WebDav Server.
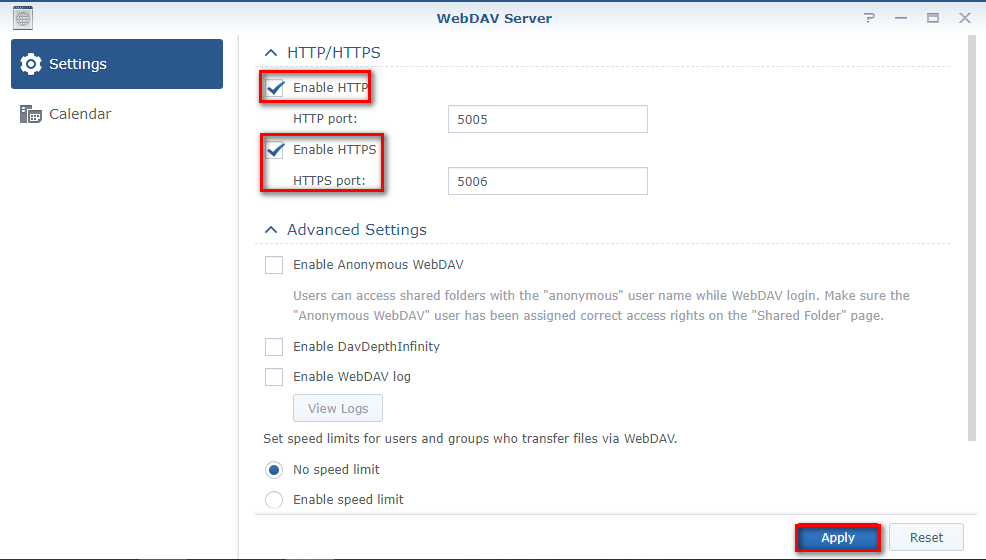
Step 5. Tick the Enable HTTP or Enable HTTPS checkbox and click Apply to save the settings.
Notes:
Google Drive
Google Workspace
OneDrive
OneDrive for Business
SharePoint
Dropbox
Dropbox Business
MEGA
Google Photos
iCloud Photos
FTP
box
box for Business
pCloud
Baidu
Flickr
HiDrive
Yandex
NAS
WebDAV
MediaFire
iCloud Drive
WEB.DE
Evernote
Amazon S3
Wasabi
ownCloud
MySQL
Egnyte
Putio
ADrive
SugarSync
Backblaze
CloudMe
MyDrive
Cubby