Migrate files across different cloud drives without manually downloading and re-uploading.

Sync two clouds or directories in two different cloud drives via one-way or two-way sync.

Backup one cloud data to another cloud for an extra protection and easy recovery.
In team collaboration or file-sharing situations, the following challenges often occur:
To address these issues, MultCloud provides the Sub-Account feature:
1. When multiple users need to access files in the same cloud drive, you don’t have to share the login credentials with them. Instead, you can use the MultCloud Sub-Account feature to assign access permissions for specific folders, ensuring secure sharing.
2. You can assign different read/write permission levels to sub-accounts based on actual needs:
3. Each sub-account is an independent MultCloud account and can use shared folders within their permission scope, and also add their own cloud drives for transfer.
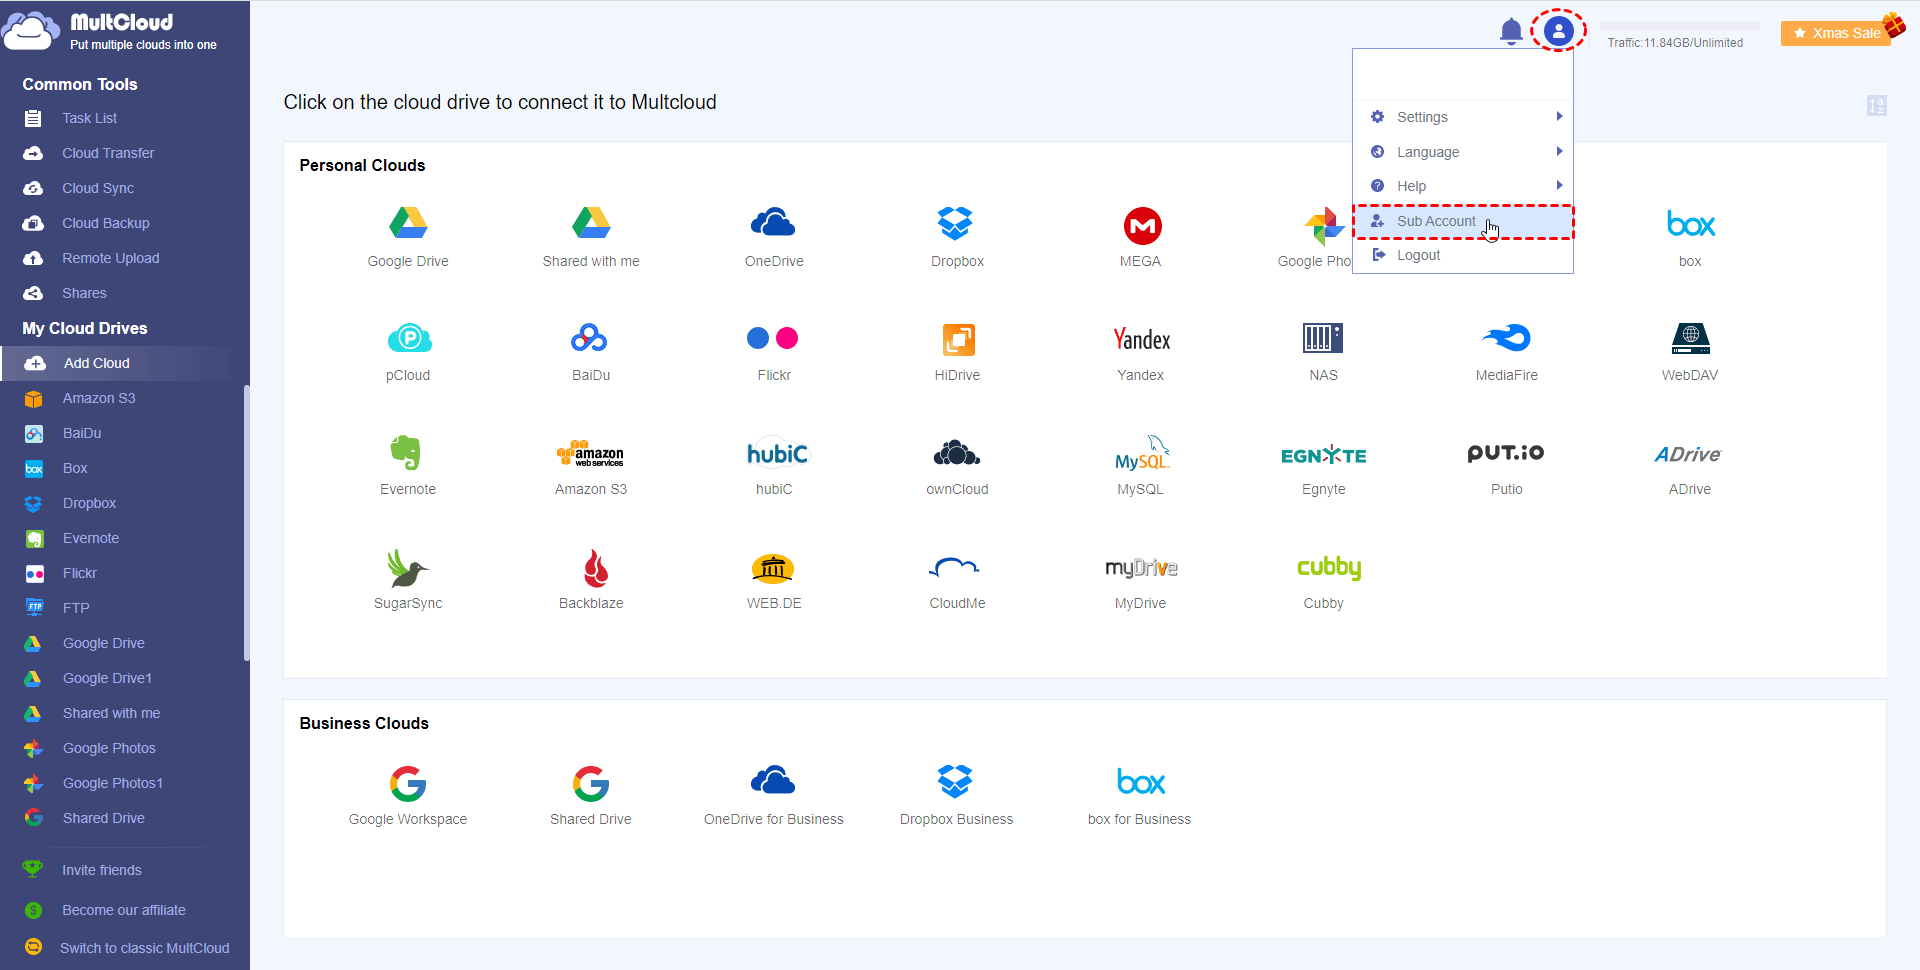
Log in to your main MultCloud account,
Click on your account name (top-right corner),
choose “Sub Account” to open Sub-accounts management window.
Note: Sub-accounts are separate MultCloud accounts. They don’t inherit the VIP privileges of main account, and can only access the files/folders shared by the main account.
If you need to unlock more features of MultCloud for the sub-account, such as add clouds, transfer files, and so on, sub-accounts can bind an email address and upgrade to VIP.
Two Modes to Add and Manage Sub-Accounts.
You first add a sub-account, then assign/share folders with it.
Step 1: Click “Add User” under User Mode:
Option 1: Click “Create Sub-Account”, then set it up with username/password, and click “OK” to add. It will create a new MultCloud account and set it as a Sub-Account.
Note: The MultCloud account created in this way is a temporary guest account, and you can log in to this account and bind your email to continue using more MultCloud features.
Option 2: If you have another MultCloud account and want to set it as a sub-account, click “Add an existed MultCloud account” and enter the existing MultCloud account, click “OK” to add.

Step 2. After successful addition, the sub-account will be listed under the “Users” List.
You can edit a sub-account (created via Option 1) by clicking the “edit” icon to change the username or password.
Step 1. Select one added sub-account, click “Assign Folder” to select one or multiple folders from the added cloud.
Step 2. Then, these folders will be assigned to the sub-account. You can tick the Read/Write permissions of these folders for the sub-account.
Read: Sub-accounts will have the authority to download, copy, and preview files/folders in this folder.
Write: Sub-accounts will have the authority to create, upload, delete, rename, and paste in this folder.
View already assigned folders and quickly assign them to other sub-accounts without re-adding them.
If you don’t want to assign folders to a sub-account, you can remove the sub-accounts from the user list.
Step 1: Click the sub-account, remove the assigned folders.
Step 2: Click the sub-account, click “delete” icon to remove the account from the list.
Note:
If the sub-account was created via Create Sub-Account (Option 1) and has not bound an email, the “delete” option will permanently delete the account.
If it is an existing MultCloud account (with a bound email), you must log into that account separately and delete it under its’ Account Settings.
You can first select folders from the added clouds of the main account, then assign permissions and users/sub-accounts.
Click “Assign Folder” under Folder Mode, then choose folders from the connected cloud.
Select one added folder, click “Add User” to add sub-accounts that allow access to the folder.
Tick the Read/Write permissions of the folders for the sub-account.
Quick Add
View the list of existing sub-accounts and quickly assign them to folders.
Select the folder, click the “Delete” icon to remove the folder from the “Folders” list.
Note: if the folder has been assigned one sub-account, you first need to remove the sub-account.
Step 1. Log in to the sub-account, click “Team Files” to check assigned/shared folders.
Step 2. The sub-account can perform actions according to the permissions assigned.
The Sub-Account feature in MultCloud allows teams to securely share cloud files without exposing the cloud’s account credentials. By flexibly assigning users or folders and setting granular permissions, you can: improve collaboration efficiency, protect sensitive account information, and ensure each user has appropriate file access.
Google Drive
Google Workspace
OneDrive
OneDrive for Business
SharePoint
Dropbox
Dropbox Business
MEGA
Google Photos
iCloud Photos
FTP
box
box for Business
pCloud
Baidu
Flickr
HiDrive
Yandex
NAS
WebDAV
MediaFire
iCloud Drive
WEB.DE
Evernote
Amazon S3
Wasabi
ownCloud
MySQL
Egnyte
Putio
ADrive
SugarSync
Backblaze
CloudMe
MyDrive
Cubby