Quick Search:
Why Sync Files to Wasabi?
Trusted by tens of thousands of customers worldwide, Wasabi Hot Cloud Storage enables organizations of all sizes to securely store and instantly access virtually unlimited amounts of data at a fraction of the cost of competing solutions. Each user signs up for a 30-day free trial and 5TB of storage for $5.99 per month.
Wasabi is ideal for cloud-based active archiving, immutable backups, ransomware mitigation, video files, big data analytics, content delivery, or as backend storage for any S3-compatible application. Syncing important files to Wasabi or other storage devices is an option for many users because:
- Avoid data loss due to force majeure. We all know that data stored on local devices may be lost due to hard drive corruption or malicious virus attack. To better protect their data, many users choose to sync data from their local device to Wasabi.
- Free up space on the local device. Cloud storage services can help you save local disk space. Important data can be stored in the cloud, and can be obtained directly from cloud storage services when needed.
- Easier to share and analyze data. Once your data is on Wasabi, you can directly use Wasabi for data analysis and share a folder in Wasabi with clients or colleagues.
How to Sync Files to Wasabi [3 Free Ways]
So, how to easily perform file sync or backup to Wasabi? Next, this article provides 3 common ways for your reference, namely using Wasabi Explorer for Windows, Wasabi Explorer for Mac and a third-party tool. Note that these applications allow you to share files between Windows or Mac hosts, but do not allow you to mount Wasabi Hot Cloud Storage as a disk volume. Now, you can read the following for details.
Solution 1: Move Files to Wasabi on Windows via Wasabi Explorer
To sync files or folders from Windows to Wasabi, you need to download Wasabi Explorer for Windows. Wasabi Explorer provides a user interface for your Wasabi storage account by allowing you to access, move, and manage files across local storage and Wasabi buckets. The following are the detailed steps:
Step 1. Download the Wasabi Explorer installation package (Updated March 16, 2022 - v6.2.2.13 Windows only).
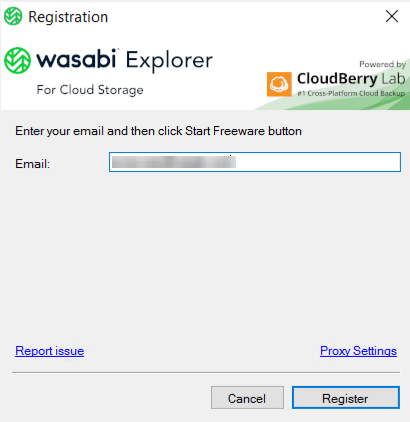
Step 2. Follow the prompts in the installation package to install Wasabi Explorer. When prompted for an email address, you can use the same email as your Wasabi account.
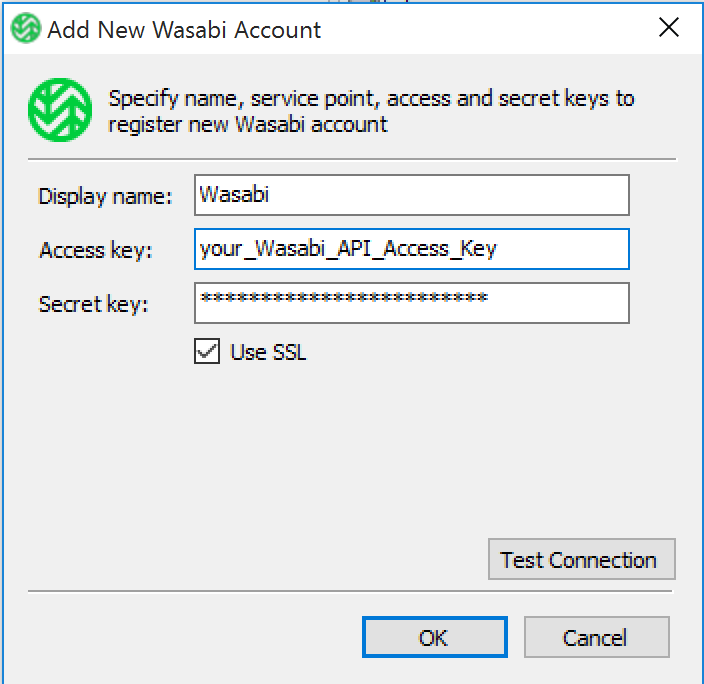
Step 3. Now enter a valid access key and secret key from your Wasabi account to connect the Wasabi Explorer app to your storage account.
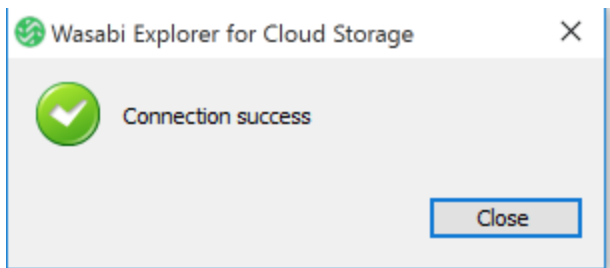
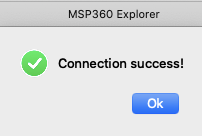
Note: You can use the Test Connection button to verify that Wasabi Explorer can talk to Wasabi and that the API key set has been verified. If the connection and key verification are successful, you will receive a connection successful message.
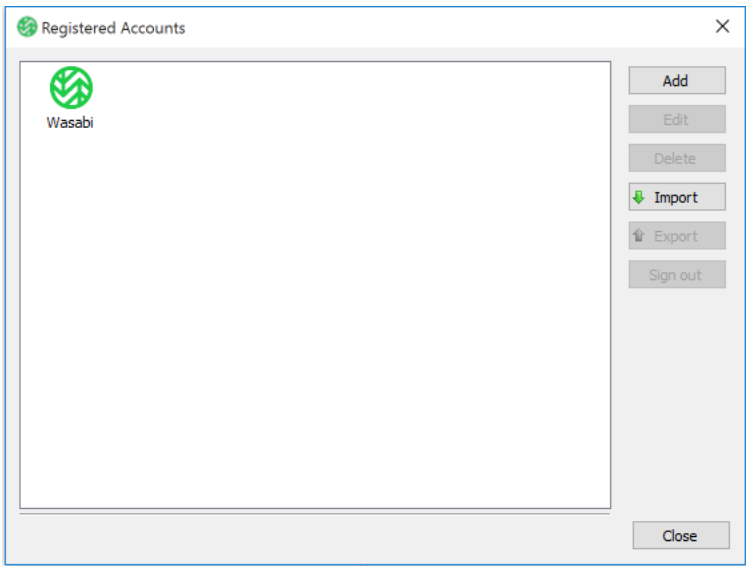
Step 4. Once the Wasabi connection is established, you will see Wasabi appear in the list of registered accounts below.
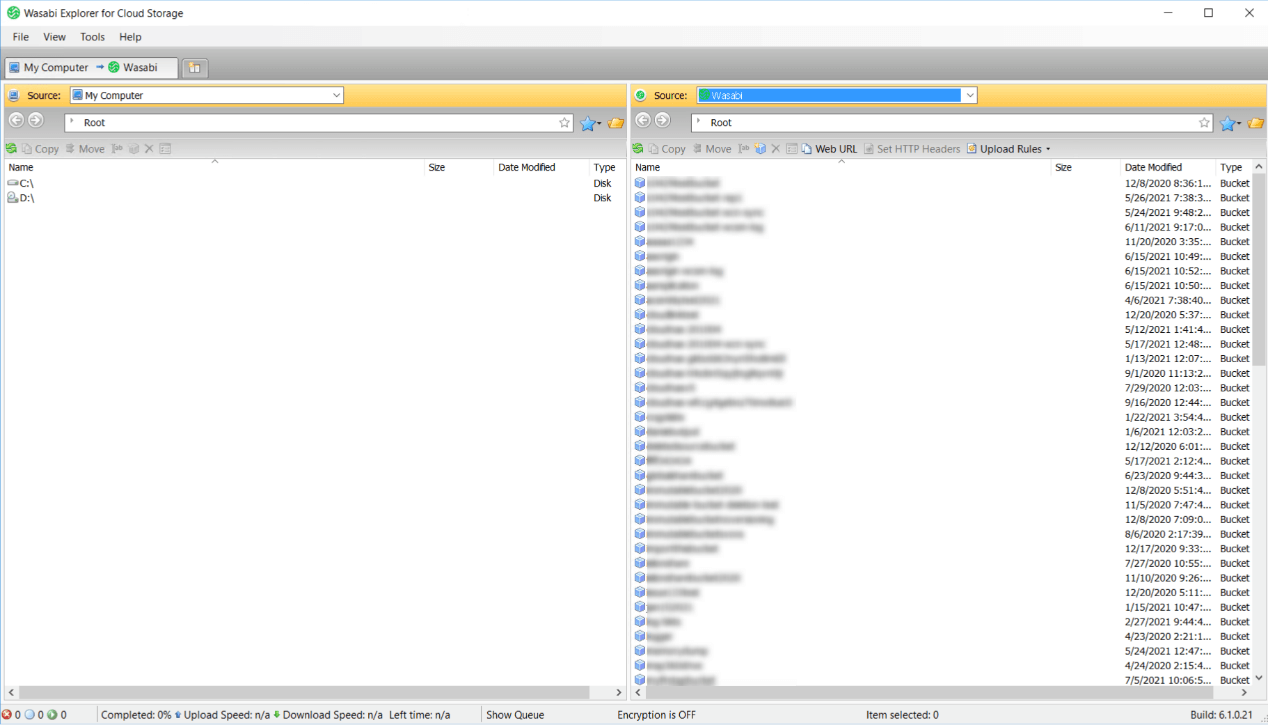
Step 5. To start using Wasabi Explorer as a way to transfer files from your PC to Wasabi, please select My Computer as the source and Wasabi as the destination, as shown in the example below. At this point, you can easily sync files to Wasabi from Windows.
Solution 2: Sync Files to Wasabi on Mac via Wasabi Explorer
Wasabi provides different versions for different operating systems. To sync files from Mac to Wasabi, you need to download Wasabi Explorer for Mac.
Step 1. Download the Wasabi Explorer for Mac installation package (Update - May 2022 v1.2.0.286).
Step 2. Follow the prompts in the installation package to install Wasabi Explorer. The workflow is as follows (version numbers may vary). When prompted for an email address, you can use the same email as your Wasabi account.
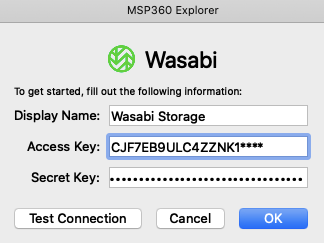
Step 3. In the left sidebar, select CONNECTIONS, then "+". When prompted, enter your preferred display name along with your API access key and API key as shown below.
Note: As in Windows, after entering the key information, you can also choose to test the connection to verify the connectivity and key set.
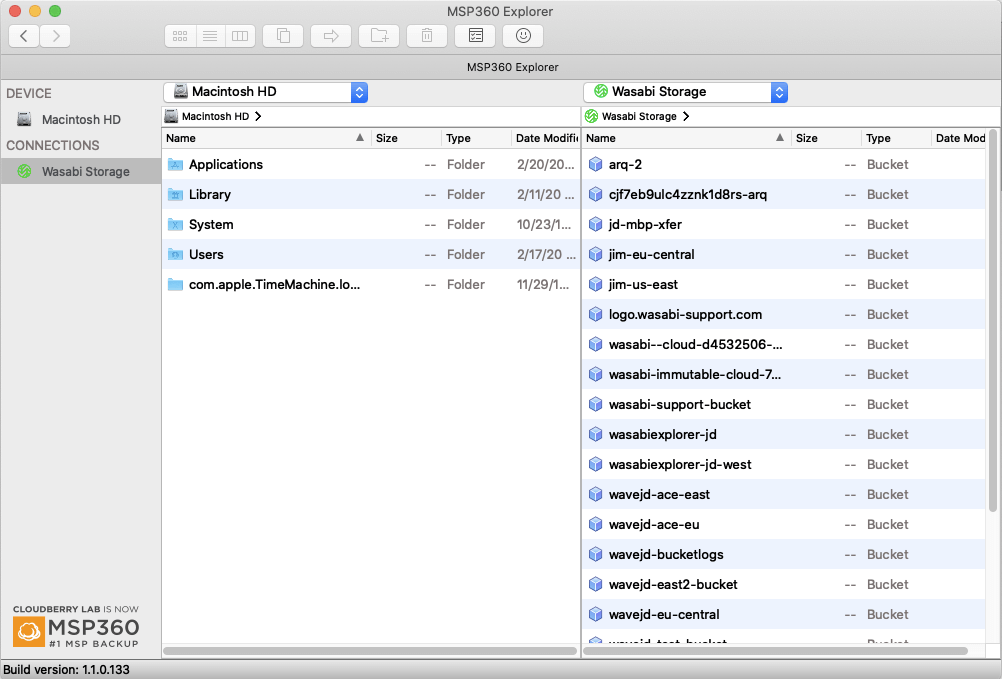
Step 4. At this point, a working connection is established between your local Mac and the Wasabi Storage target. You can adjust the left and right sides of the Wasabi Explorer pane to allow you to send files and folders to a Wasabi bucket from your local Mac as shown below.
Solution 3: Upload Files to Wasabi on Mac & Windows by MultCloud
"I have a lot of folders on my computer to upload, and sometimes due to network outages, the uploading process restarts. So how can I add folders to Wasabi quickly and efficiently?" In this case, you can zip the folder and put the zipped file to your Wasabi. In order not to endure network interruption, you can directly use the third-party tool MultCloud to upload the compressed file.
MultCloud is a free and secure cloud file manager designed to better manage your cloud drives and help you efficiently access data from different cloud drives. With MultCloud, you don't need to worry about the "Wasabi upload failed" problem. MultCloud has the following advantages:
- Safety. MultCloud authorizes access to cloud drives through OAuth and does not save your password information, let alone your data in any cloud drives.
- Support many cloud drives. MultCloud supports more than 30 cloud drives such as OneDrive, Wasabi, NAS, and Dropbox.
- Various functions. MultCloud provides users with useful features such as Cloud Transfer, Team Transfer, Cloud Sync, Cloud Backup, and Remote Upload, designed to make it easier for users when dealing with large amounts of data.
- Cost-effectiveness. MultCloud has reasonable price plans for users. Compared with other cloud drives, it provides more features for free users and charges the best price for paid users.
Now, let's figure out the detailed steps on how to upload a zip file to Wasabi using MultCloud:
Step 1: Sign up for MultCloud for free via your preferred email, or you can log in directly with only your Google or Facebook account.
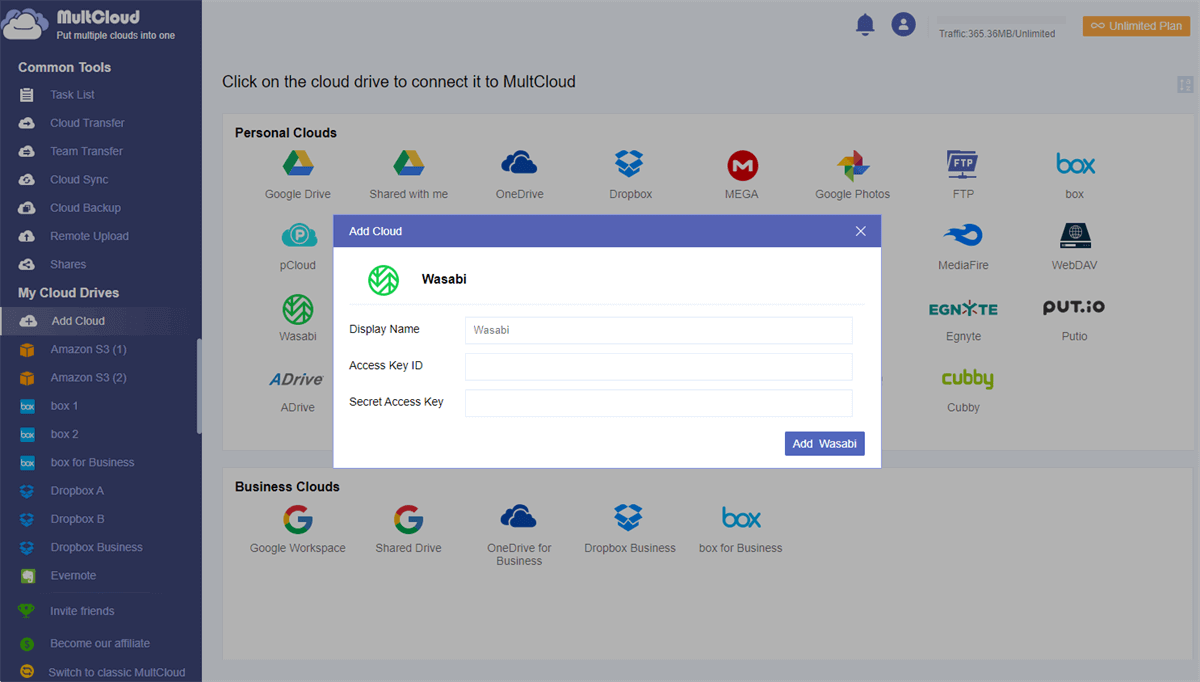
Step 2: Press "Add Cloud" to add Wasabi.
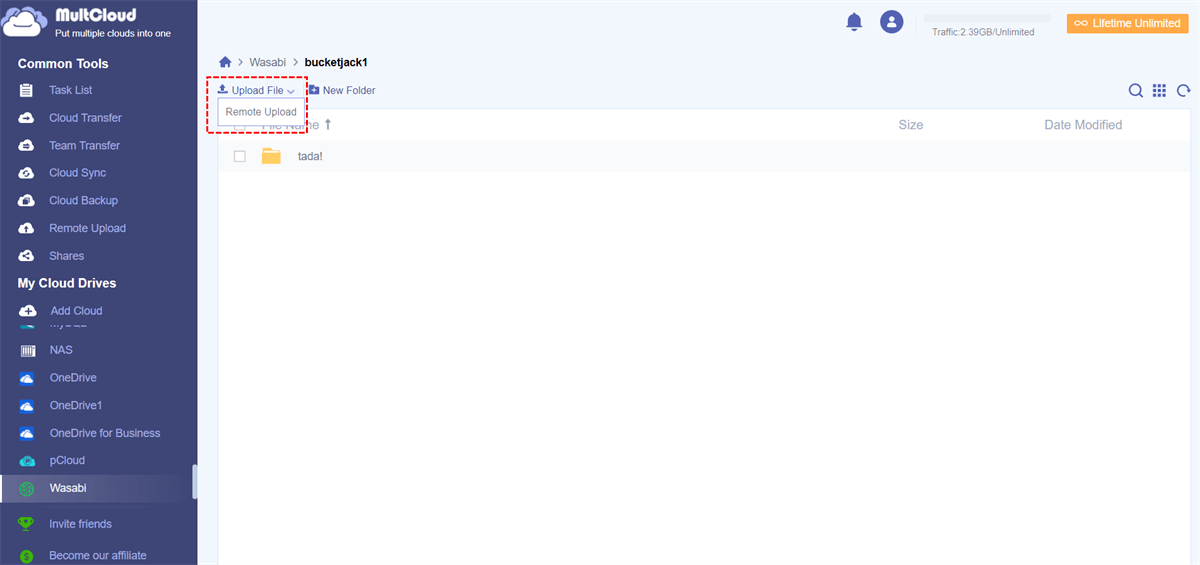
Step 3: Click the "Upload File" tab and select the compressed folder you want to upload. Then, you should wait for the process to complete. You can also drag and drop files directly to a folder in Wasabi.
Notes:
- MultCloud can handle tasks in the background, so you can just shut down the interface or computer.
- If you have any folders to upload, then you can collect these folders into a specific folder and upload this specific folder to Wasabi. The larger the folder, the slower the transfer speed.
- If you are wondering how to upload documents to Wasabi: Uploading a document or file is very similar to uploading a folder. Therefore, you can choose to upload files through the official Wasabi webpage or a third-party tool, MultCloud.
Bonus Tip: Automatically Sync NAS to Wasabi
To obtain and share files better or more securely, many users use NAS to create private cloud servers. This allows for easy storage and retrieval of personal data, and backup of home theater and game data. But many users find it difficult to sync NAS and Wasabi data. do not worry! MultCloud can also help you automatically sync your NAS to Wasabi.
The "Cloud Sync" function provided by MultCloud supports 10 sync modes: "Real Time Sync", "One-way Sync", "Two-way Sync", "Simple Sync", "Mirror Sync", "Move Sync", "Cumulative Sync", "Update Sync", "Incremental Sync", "Full Backup Sync". These sync modes can meet most of your needs.

- Offline Sync: Don't rely on network connection, but use the data traffic for syncing cloud files.
- Direct Sync: Don't go through the local storage, but directly sync files across cloud online.
- Flexible Sync: Up to 10 sync modes in available for different requirements, including real-time sync.
- Automatic Sync: Set up a schedule to make the sync task automatically run in preferred frequency.
Below are the detailed steps to sync files to Wasabi from NAS.
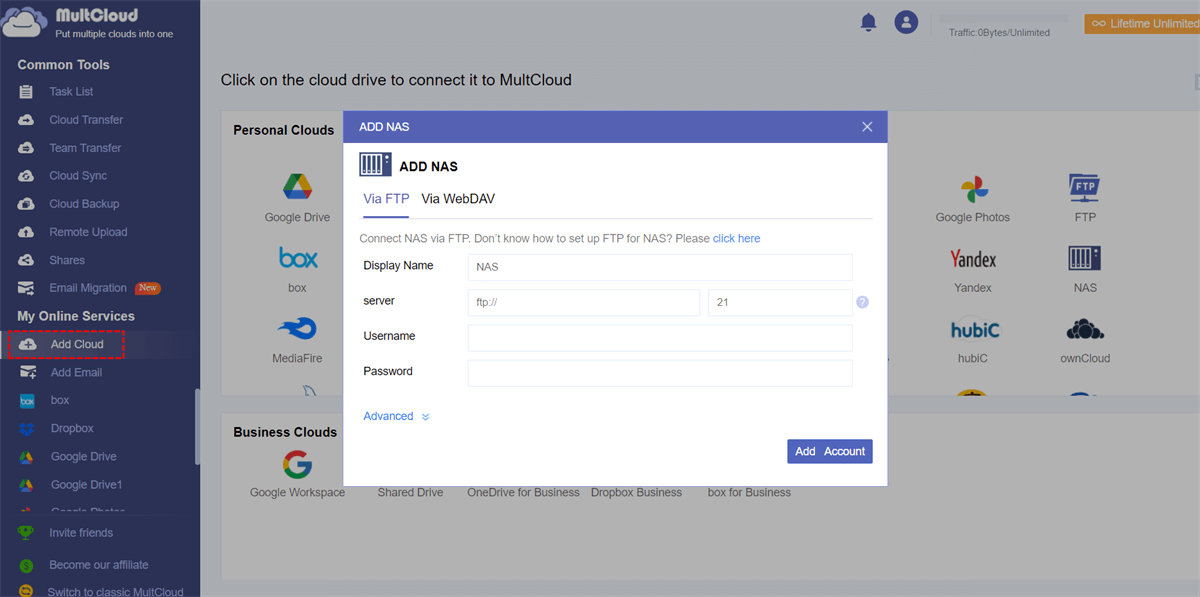
Step 1: Log in to MultCloud and click the "Add Cloud" button to add your NAS account to MultCloud. Select your NAS among the cloud providers listed below and authorize MultCloud to access your NAS account, your NAS account will be added to MultCloud.
Step 3: Click Wasabi and follow the instructions to finish adding Wasabi to MultCloud.
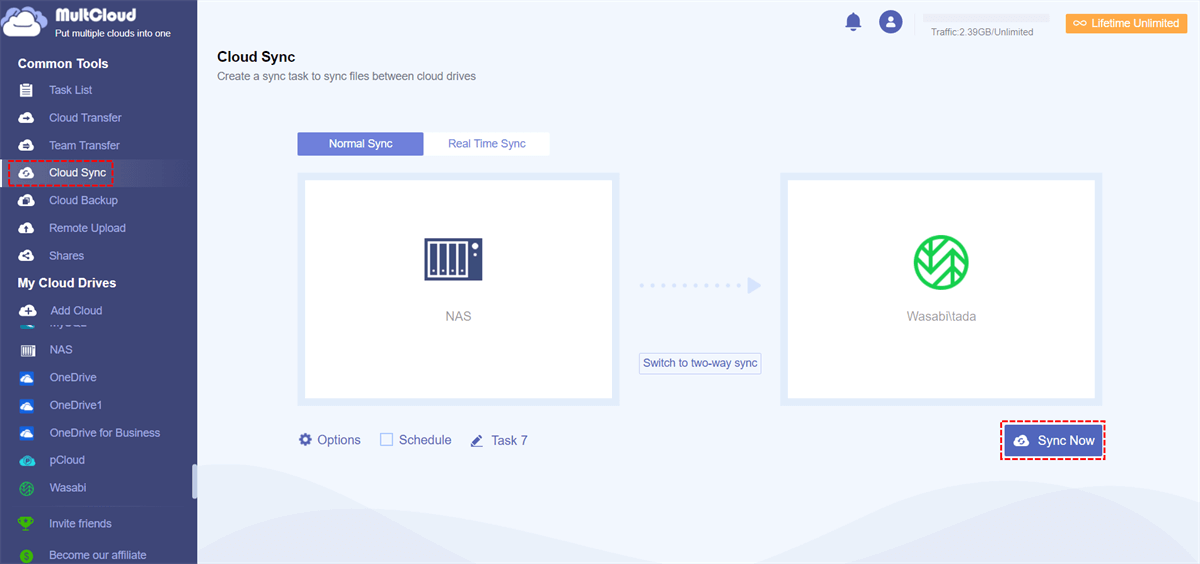
Step 4: Now that you want to sync your NAS to Wasabi, click "Cloud Sync", select your NAS as the source, select the bucket in Wasabi as the destination, click "Sync Now" and the process will begin.
Notes:
- If you have a lot of files to sync, you can close the page because MultCloud can run tasks in the background.
- If you want to know the execution result of the task, you can set up an email notification in "Options", so as to know the execution status of the task in time.
- When creating a cloud sync task, MultCloud runs your task in simple sync mode by default. If you want to run tasks in other modes, you can manually select the one you like best.
Conclusion
How to backup or sync files to Wasabi? The 3 methods provided in this article can help solve it well. Also, if you need to sync data from your NAS to Wasabi, you can use MultCloud to help. Other features provided by MultCloud, such as Cloud Transfer, Team Transfer, Cloud Backup and Remote Upload, can also help you easily achieve cloud-to-cloud transfer and upload files to the cloud easily.
MultCloud Supports Clouds
-
Google Drive
-
Google Workspace
-
OneDrive
-
OneDrive for Business
-
SharePoint
-
Dropbox
-
Dropbox Business
-
MEGA
-
Google Photos
-
iCloud Photos
-
FTP
-
box
-
box for Business
-
pCloud
-
Baidu
-
Flickr
-
HiDrive
-
Yandex
-
NAS
-
WebDAV
-
MediaFire
-
iCloud Drive
-
WEB.DE
-
Evernote
-
Amazon S3
-
Wasabi
-
ownCloud
-
MySQL
-
Egnyte
-
Putio
-
ADrive
-
SugarSync
-
Backblaze
-
CloudMe
-
MyDrive
-
Cubby

.png)

