What is Shared Drive (Team Drive)?
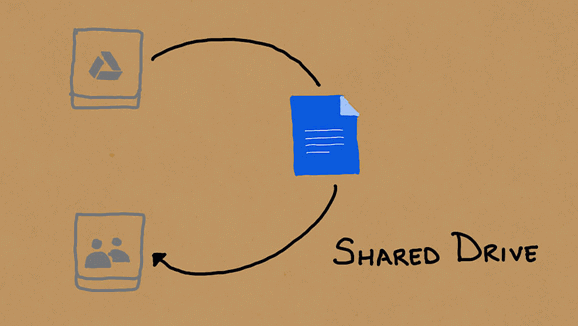
Shared Drive, formerly known as Team Drives, is the core function of Google Workspace (G Suite) which allows teams, groups, companies, and schools to store and access files easily in the Shared Drive and then collaborate with each team member more efficiently. Different from My Drive, which is a personal drive for individuals users, the Shared Drive is owned by a team or group. And files or folders stored in it belong to the team members instead of any individual.
Shared drives are designed to simplify collaboration and streamline file management. With it, team members can easily share, edit and comment on files. Besides, Shared Drives allows team leader to set different access level, which enhances data security to some extent. Also, administrators can track team members' activity through the audit logs.
Why Create a Google Shared Drive?
As a great collaboration tool designed by Google, Google Shared Drives can offer you and your team so many benefits, including:
• No Worry about Employee Turnover Anymore: One of the advantages of Google Shared Drive is that the team of this Shared Drive owns all the files and folders in it. So, even if one member of your team leaves, all the files will still exist in the Shared Drive.
• Effortless Team File Sharing: By adding all team members to a Shared Drive with different access permissions, everyone in the team can find the same content without sharing files individually.
• Simplified file management: With a shared drive, team members can easily organize files and folders, making it easier to find the exact information they need.
• Collaboration: Shared drives allow team members to collaborate on files in real-time, and provide feedback without worrying about version control issues.
• Access Team Files from Desktop: If you use Google Drive for Desktop to sync Shared Drive to desktop, then you can access team files conveniently on your computer.
Overall, Shared Drive can help a lot when it comes to streamlining collaboration and improving productivity.The following part of this full guide about how to create a shared Google Drive will show you step-by-step instructions to easily create Google Shared Drive. And after learning about how to create shared Google Drive, you will also get the best method to manage your Shared Drives and other cloud storage services most efficiently.
How to Create a Shared Drive in Google Drive
To successfully create Google Shared Drives, you need to have at least one Google Workspace account or Google Workspace for Education account and a browser with a stable Internet connection. If you have all these things, you can follow the simple steps below to create a shared Google Drive at once.
Create Shared Drive in Google Drive
Step 1. Log in to Google Drive official website with a Google Workspace account.
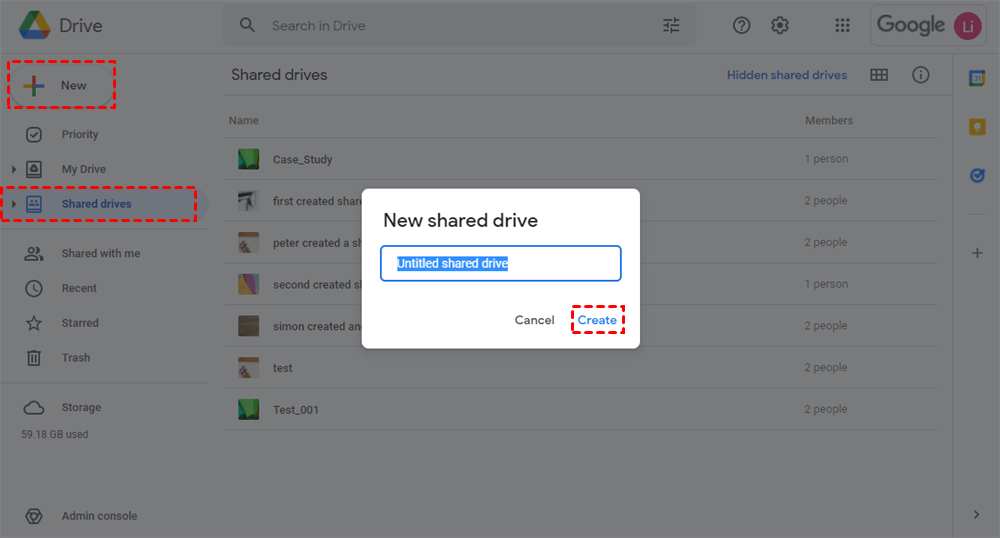
Step 2. Switch to the “Shared drives” page from the left Drives list.
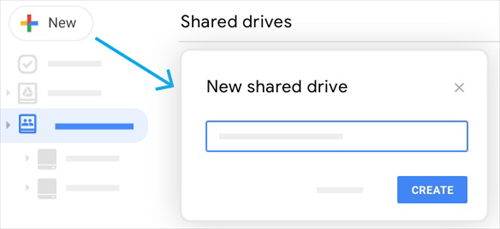
Step 3. Click “+New” in the upper left corner to create Shared Drive.
Step 4. Name the new Shared Drive in the pop-up window, then click “Create”.
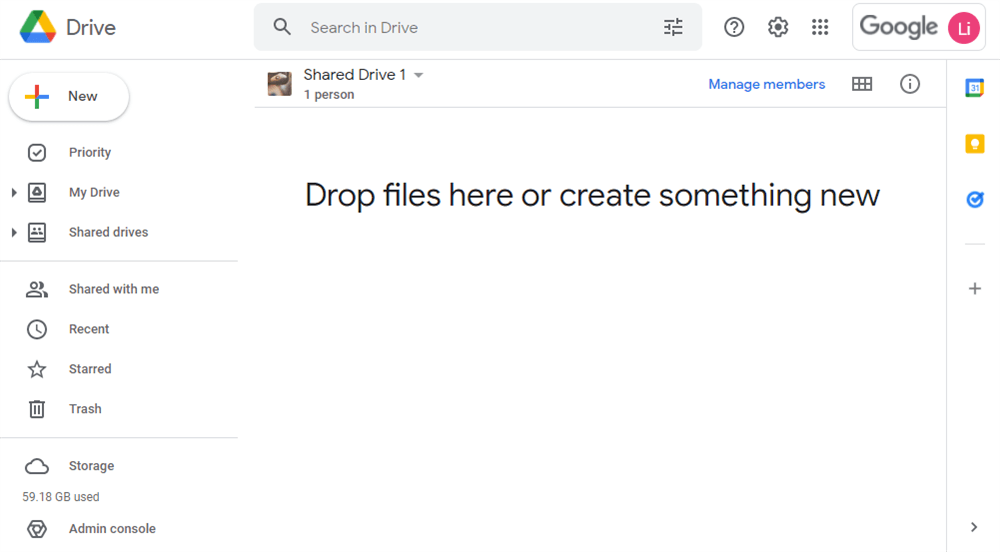
Step 5. Open the Shared Drive and move files from My Drive to Shared Drive or upload files to Shared Drive.
Add Members to Shared Drive
Step 1. Open the newly created Shared Drive.
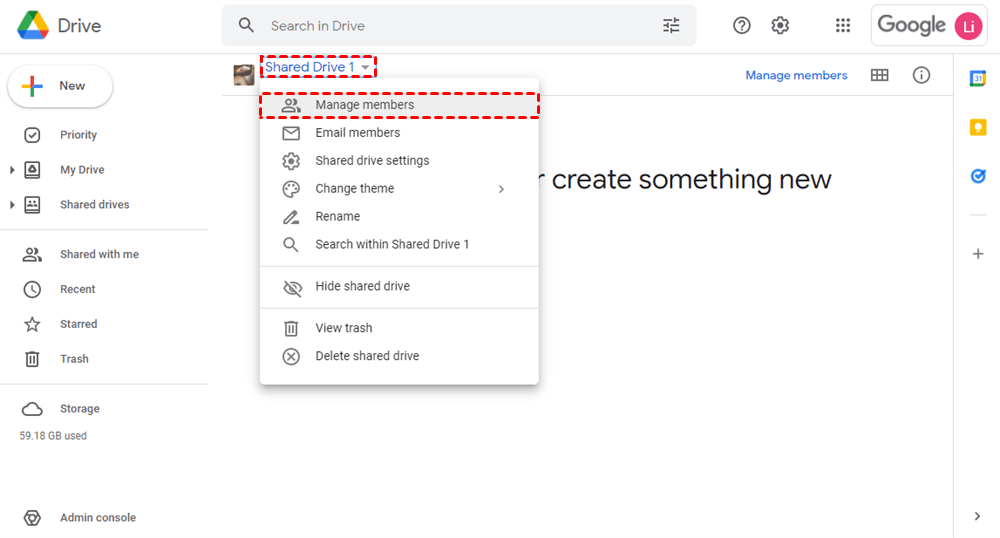
Step 2. Click the title of the Shared Drive and choose “Manage members” in the dropdown menu.
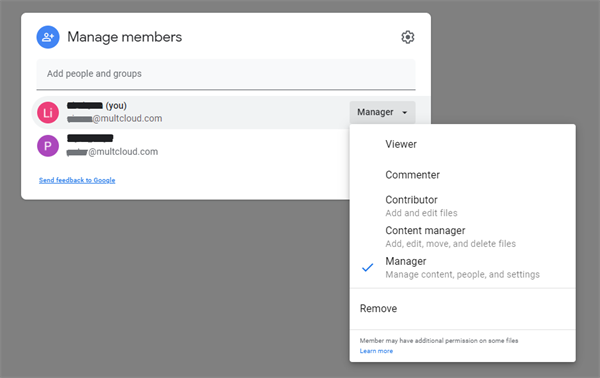
Step 3. Add people and groups in the pop-up window.
Step 4. Choose access permission of the added members in the dropdown menu.
Step 5. Click “Done” to finish adding members.
Tip: You can look through the table below to figure out the differences between the 5 access permissions.
| Manager | Content Manager | Contributor | Commenter | Viewer | |
|---|---|---|---|---|---|
| View content | Yes | Yes | Yes | Yes | Yes |
| Comment content | Yes | Yes | Yes | Yes | No |
| Make, approve and reject edits | Yes | Yes | Yes | No | No |
| Create files and folders, upload files | Yes | Yes | Yes | No | No |
| Add people and groups to specific files | Yes | Yes | Yes | No | No |
| Add people and groups to specific folders | Yes | No | No | No | No |
| Move files and folders out | Yes | Yes | No | No | No |
| Move files and folders within | Yes | No | No | No | No |
| Move files and folders into trash | Yes | No | No | No | No |
| Delete files and folders permanently | Yes | Yes | Yes | No | No |
| Restore files and folders from trash | Yes | No | No | No | No |
Bonus Tip: How to Manage Shared Drives Efficiently
The normal way to manage Shared Drives of course is to log in to Google Drive's official website and open each Shared Drive to view, edit, download, comment, or share. But how if you are added in Shared Drives which are not in the same Google Workspace domain or you want to move files from Shared Drive to My Drive across accounts? Well, you can try a free web-based cloud file manager called MultCloud to make your Shared Drive management easy and secure.
MultCloud is a professional multiple cloud storage manager that aims to help you manage 30+ major cloud storage services easily in a single and well-designed interface with useful cloud built-in functions like Upload, Download, Delete, Preview, Rename, Cut, Copy. You can also use Cloud Transfer, Cloud Sync, or Cloud Backup to move files from Shared Drive to other places outside this Google Workspace account seamlessly without data loss.
Here we will show you how to manage Shared Drives of different accounts most easily after you create Shared Drive in Google Drive.
Step 1. Create a MultCloud account for free.
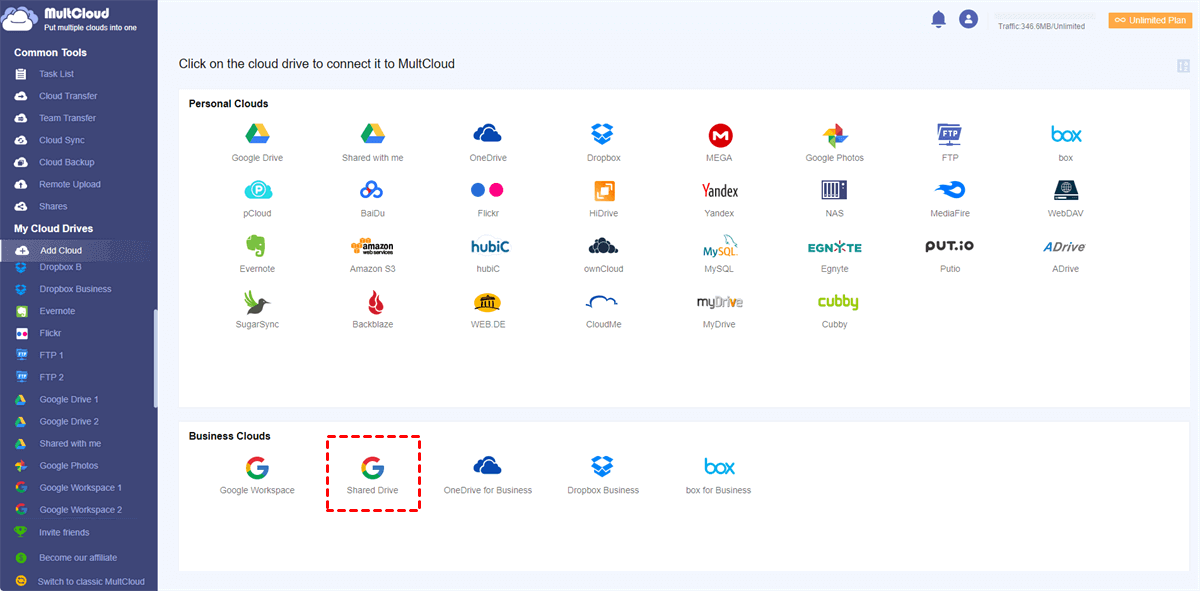
Step 2. Choose “Shared Drive” and enter one Google Workspace account to add Shared Drives of this account to MultCloud.
Tips:
- In MultCloud, a Google Workspace account is divided into Google Workspace (My Drive), Shared Drive, and “Shared with me” folder. You can add these Drives respectively to MultCloud and manage files in these places with better order.
- MultCloud has no limit to the number of adding cloud accounts, which means you can add as many clouds as you have to MultCloud to manage for completely free.
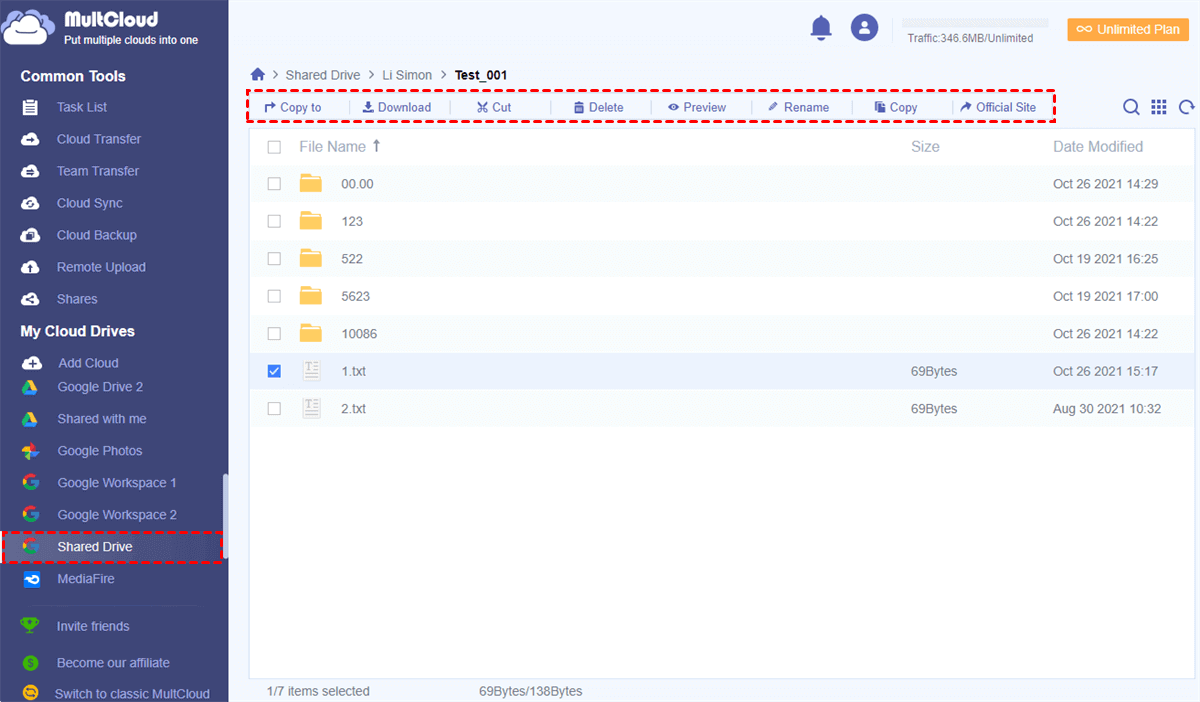
Step 3. Open a Shared Drive from the “My Cloud Drives” list.
Step 4. Tick the file and choose a function in the feature bar above to manage files according to your needs.
After adding Shared Drives to MultCloud, you can also benefit a lot by using clouds with the fascinating features below.
- Sub-accounts Management: After subscribing, you can collaborate with users from different brands of clouds together in MultCloud.
- Cloud Transfer: Transfer data across clouds with a single click, schedule plan, and offline ability.
- Team Transfer: Transfer multiple accounts between domains or different business clouds with auto-matching source and target account.
- Cloud Sync: Sync files between clouds with 10 multifunctional modes according to your needs.
- Cloud Backup: Backup files and folders from cloud to cloud with best backup version management.
Conclusion
The operation of how to create a Shared Drive in Google Drive could be so simple if you follow the steps illustrated in this article carefully. What’s more, it would be great if you could use MultCloud to solve the problem of how to access Google Shared Drive especially when you own more than one Google workspace account and are tired of switching accounts.
MultCloud Supports Clouds
-
Google Drive
-
Google Workspace
-
OneDrive
-
OneDrive for Business
-
SharePoint
-
Dropbox
-
Dropbox Business
-
MEGA
-
Google Photos
-
iCloud Photos
-
FTP
-
box
-
box for Business
-
pCloud
-
Baidu
-
Flickr
-
HiDrive
-
Yandex
-
NAS
-
WebDAV
-
MediaFire
-
iCloud Drive
-
WEB.DE
-
Evernote
-
Amazon S3
-
Wasabi
-
ownCloud
-
MySQL
-
Egnyte
-
Putio
-
ADrive
-
SugarSync
-
Backblaze
-
CloudMe
-
MyDrive
-
Cubby
.png)

