Quick Search:
Introduction to Evernote Sharing
Evernote has become the digital notebook of choice for millions around the world. Whether you’re organizing class notes, tracking your business ideas, or building a team knowledge base, its notebook-sharing feature makes collaboration super simple. But what if you need to take back control? Maybe you shared the wrong notebook or collaborated with someone temporarily. That’s where knowing how to stop sharing becomes essential.
If you’ve ever fumbled through menus or wondered whether someone still has access to your notes, you're not alone. In this guide, I’ll walk you through exactly how to stop sharing a notebook in Evernote, regardless of what device you’re using.
Why You Might Want to Stop Sharing a Notebook
Sometimes, sharing isn’t forever. And that’s okay. There are plenty of good reasons to hit the brakes on shared notebooks.
Privacy and Confidentiality
Maybe you added a personal journal entry or sensitive client information that wasn’t meant for others’ eyes. If the notebook was shared beforehand, those people might still have access. That’s a problem you’ll want to fix immediately.
Think about your Evernote like your diary or professional binder—some pages are just for you. When privacy is on the line, stopping shared access is a no-brainer.
Editing Conflicts and Content Control
When multiple people edit or add to your notes, things can get messy fast. Ever had your to-do list edited without knowing? Or worse, someone deleted your info thinking it was outdated? If you're dealing with clashing edits or lack of control, revoking sharing rights can help restore order.
It's like too many cooks in the kitchen—you need to take the pot off the stove before the whole thing boils over.
Organization and Cleanup
Sometimes, it's just about tidying up. Shared notebooks from old projects, group studies, or temporary collaborations can linger around longer than necessary. They clutter your Evernote space and, frankly, your brain too.
Unsharing these is the equivalent of digital spring cleaning—it feels amazing once done.
Understanding How Notebook Sharing Works
Before you stop sharing, it's important to know how Evernote's sharing system functions. That way, you'll understand exactly who sees what—and what they can do with it.
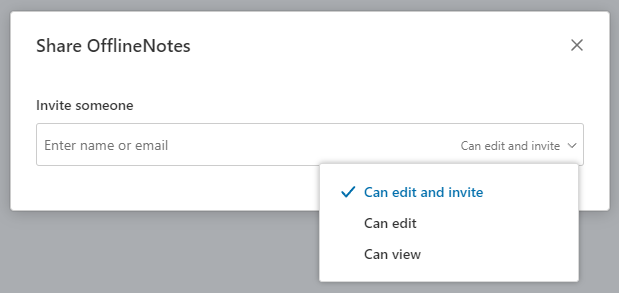
Types of Sharing Permissions
Evernote offers different permission levels:
- Can view – User can only see the content.
- Can edit – User can make changes but not share it further.
- Can edit and invite – User can edit and also re-share the notebook with others.
Each of these levels comes with different risks, especially the last one. If you granted someone “edit and invite” access, they could’ve brought others in without you knowing.
Who Can Access Your Notebooks
You might be surprised. Sometimes, notebooks remain shared with users you’ve forgotten about. Maybe a classmate from a past group project or a team member who left the company months ago.
Understanding who has access is the first step to taking control again.
Evernote Stop Sharing a Notebook: Step-by-Step Guide
Alright, let’s roll up our sleeves. Below are step-by-step methods for stopping notebook sharing across different Evernote platforms.
1. Stop Sharing from Desktop (Windows/Mac)
Most users manage their notebooks from the desktop app. Thankfully, stopping sharing here is straightforward.
Step 1. Navigating the Evernote Interface
1. Open Evernote on your computer.
2. Go to the Notebooks section in the left-hand panel.
3. Click on the notebook you want to stop sharing.
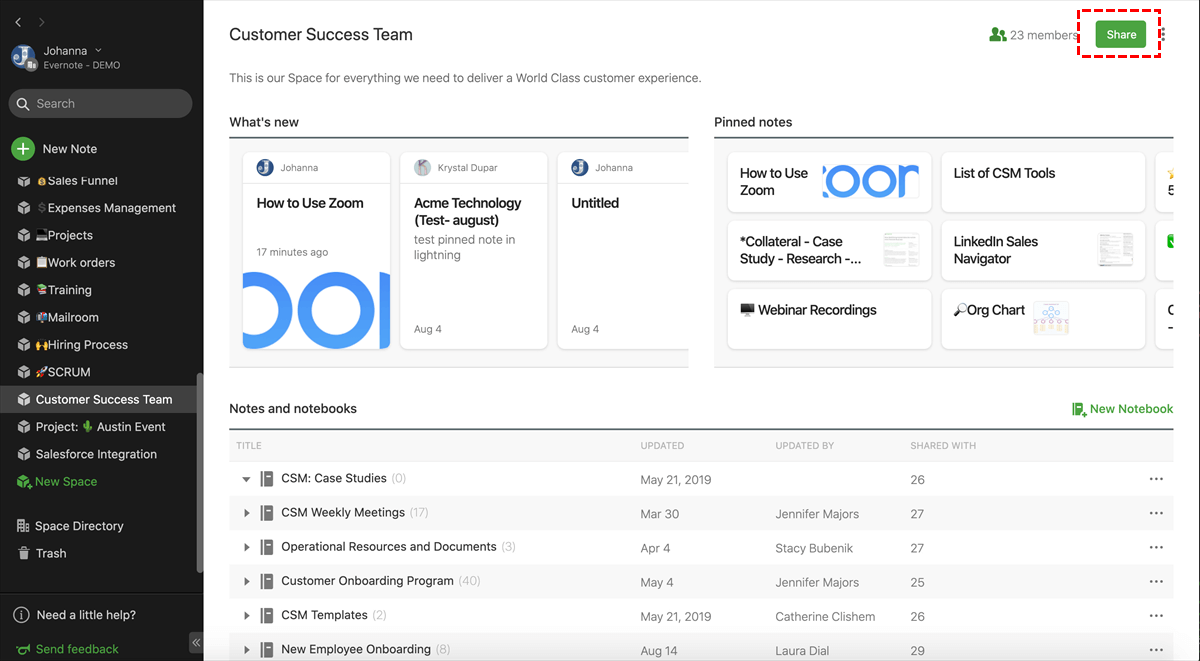
4. In the top right, look for the Share button (it usually has a person icon).
5. Click it, and you’ll see a list of people with access.
Step 2. Removing Users or Disabling Link Sharing
- For individual users:
- Click the three dots next to their name.
- Select Remove Access or Change Permission.
- For public or link-based sharing:
- Look for an option labeled Link Sharing On or similar.
- Toggle it off to stop anyone with the link from accessing the notebook.
Once done, those users or the public link will no longer have access. It’s like slamming the door shut—and locking it.
2. Stop Sharing from Evernote Web
If you’re more of a browser user, Evernote Web has your back. Here’s how to pull the plug on sharing.
Step 1. Accessing Notebook Settings
1. Log in to Evernote.com.
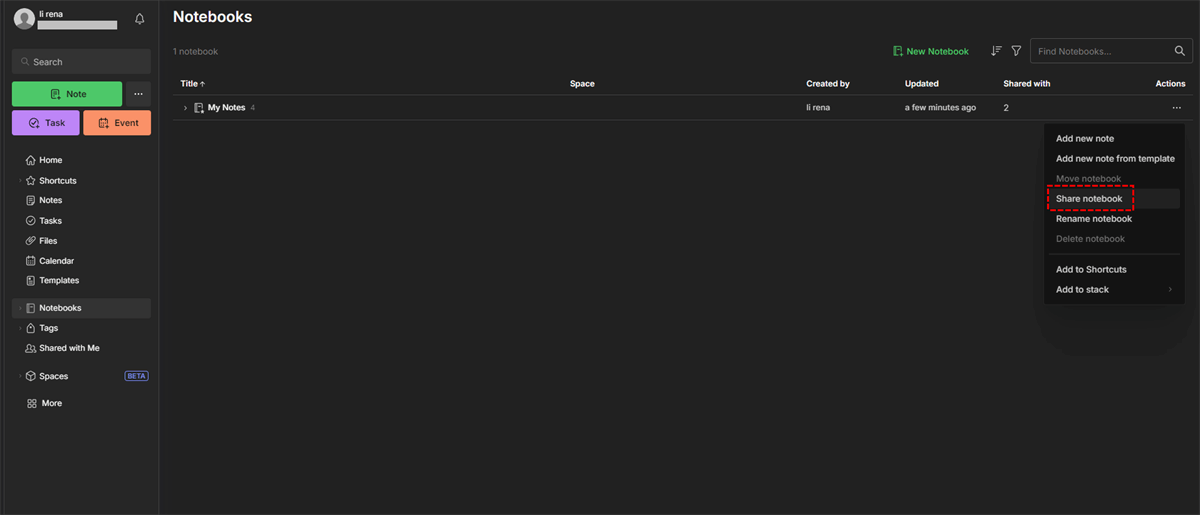
2. On the left sidebar, click Notebooks.
3. Choose the shared notebook.
4. Hit the Share notebook button.
Step 2. Adjusting or Removing Access Permissions
- Just like in the desktop version, you’ll see everyone the notebook is shared with.
- Click on their name and select Remove Access.
- Don’t forget to turn off public links too if they’re enabled.
This ensures no one outside your chosen circle gets in—even if they had a link from before.
3. Stop Sharing from Evernote Mobile App
Evernote’s mobile app is handy for on-the-go tweaks. Here’s how to unshare directly from your phone.
Situation 1. Using Android Devices
1. Open Evernote on your Android.
2. Tap the three horizontal lines (hamburger menu) in the top-left corner.
3. Tap Notebooks and choose the one you want to stop sharing.
4. Tap the Share icon (person or three-dot menu).
5. Select Manage People.
You can now remove users or disable link sharing right from your palm.
Situation 2. Using iOS Devices
The process is nearly identical to Android:
1. Open the app on your iPhone or iPad.
2. Navigate to Notebooks, then tap the one you want.
3. Hit the Share button.
4. Choose Manage People.
5. Remove any users or turn off sharing links.
Whether you’re in line at Starbucks or sitting on the couch, you're in control.
Troubleshooting Sharing Issues
Can’t Find the Share Option?
If you're having trouble finding the share settings:
- Make sure you're the owner of the notebook.
- Collaborators can't manage sharing.
- Update the app to the latest version.
Permissions Not Updating?
Still seeing people listed? Try:
- Logging out and back in.
- Clearing the app cache.
- Using Evernote Web to double-check permissions.
Conclusion
At the end of the day, your digital privacy is as important as locking your front door. If you’ve been wondering how to regain control over your digital content, knowing how to Evernote stop sharing a notebook is a must. Whether it's a shared grocery list or sensitive business notes, you now know exactly how to lock things back down. Stay organized, stay safe, and share wisely!
Bonus Tip: Easy Way to Move Evernote Data – MultCloud
Evernote is great, but what if you're thinking about switching to another platform—or just want a backup somewhere else? That's where MultCloud comes in.
MultCloud is a cloud file manager that lets you transfer, sync, or back up data between different cloud services without downloading anything manually. Think of it as a universal remote for your cloud storage—Evernote included!
Why Use MultCloud with Evernote?
- One-click migration from Evernote to Google Drive, OneDrive, Dropbox, etc.
- No downloads required — everything runs in the cloud.
- Secure and encrypted data transfers.
- Great for backing up important notebooks or moving them to a new platform.
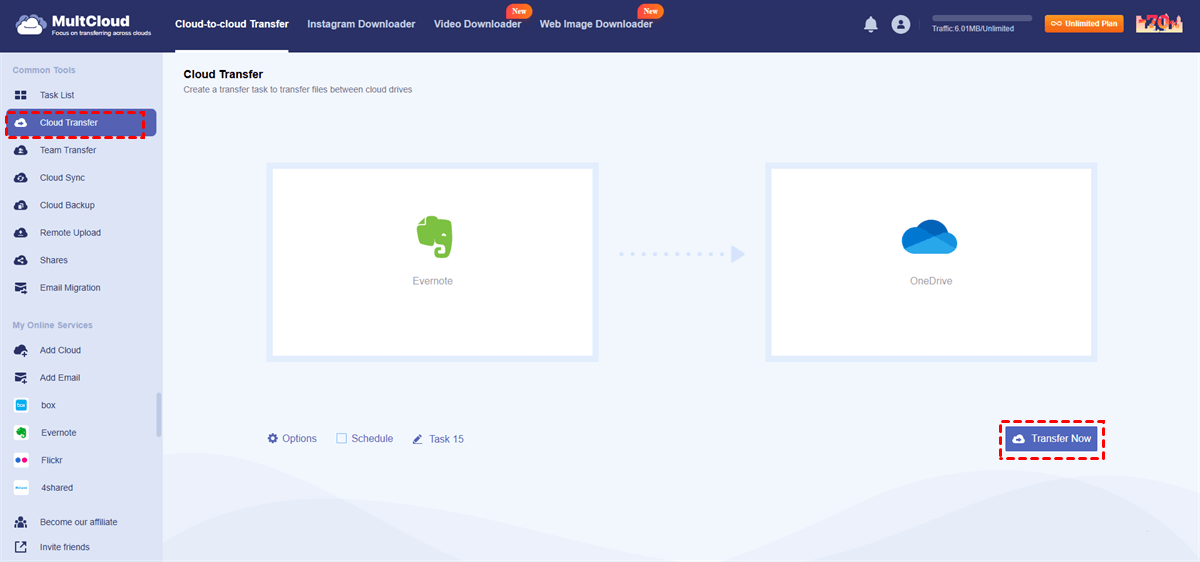
How to Use MultCloud with Evernote
1. Go to MultCloud’s website.
2. Create a free account.
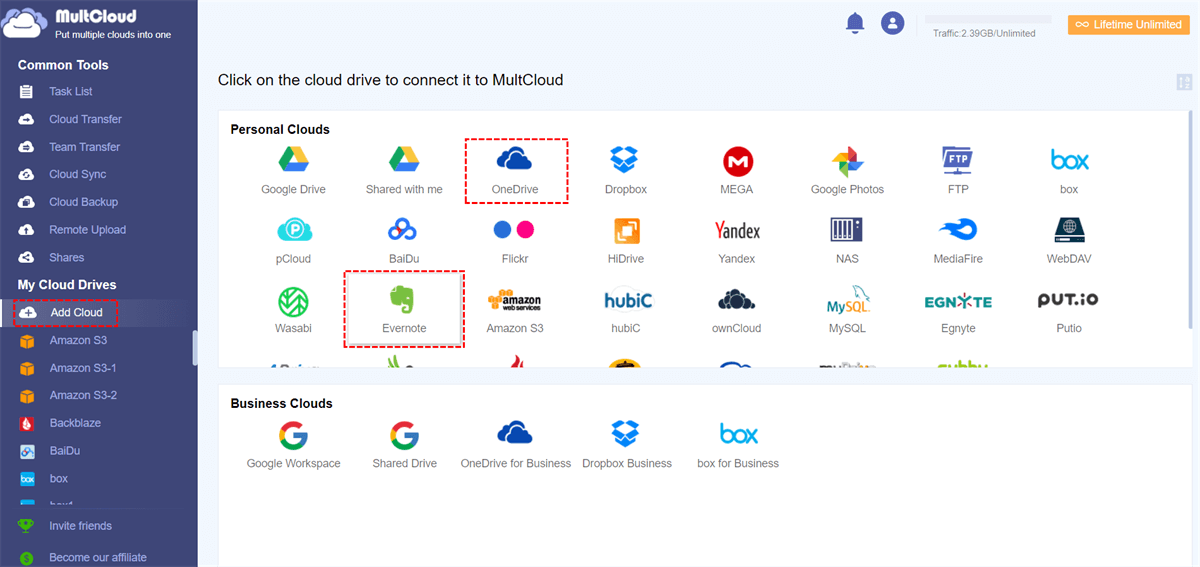
3. Add Evernote and your destination cloud service (like OneDrive).
4. Choose the notebooks you want to transfer.
5. Hit transfer and let MultCloud handle the rest!
If you're planning to reorganize your notes or move on from Evernote, MultCloud is the hassle-free way to get it done. It’s especially useful when decluttering your digital workspace after you've stopped sharing notebooks.
MultCloud Supports Clouds
-
Google Drive
-
Google Workspace
-
OneDrive
-
OneDrive for Business
-
SharePoint
-
Dropbox
-
Dropbox Business
-
MEGA
-
Google Photos
-
iCloud Photos
-
FTP
-
box
-
box for Business
-
pCloud
-
Baidu
-
Flickr
-
HiDrive
-
Yandex
-
NAS
-
WebDAV
-
MediaFire
-
iCloud Drive
-
WEB.DE
-
Evernote
-
Amazon S3
-
Wasabi
-
ownCloud
-
MySQL
-
Egnyte
-
Putio
-
ADrive
-
SugarSync
-
Backblaze
-
CloudMe
-
MyDrive
-
Cubby
