Introduction
Ever felt your phone groaning under the weight of countless photos? Or is your MacBook beginning to look like a digital photo album filled to the brim with memories? "Can I delete photos after uploading to iCloud?" may be on your mind if you've taken use of the ease that is iCloud images. Without a doubt, the answer is yes!
You may safely save your images in your iCloud library, so this article will walk you through the process of deleting them to free up space on your devices.
The Benefits of iCloud Photos
Let's examine iCloud Photos' benefits first before delving into deleting techniques:
- An Integrated Photo Library Throughout Devices: Imagine being able to instantaneously view a stunning sunset that you captured with your iPhone on your MacBook or iPad. This magic is made possible by iCloud Photos, which unifies your library across all of your Apple devices. Make changes on one device and they appear on all of others, keeping your photographs consistent and organized.
- Reliable and Safe Backups: Mishaps happen in life, and accidents do happen. It could be really distressing to misplace your phone or have hardware malfunction. Your digital safety net is iCloud Photos, which makes sure your priceless memories are safely stored on the cloud. No more racing heartbeats in the event of a phone drop!
Free Up Space by Deleting Photos After Uploading
Now, back to the question at hand: how can you free up space by deleting photos already uploaded to iCloud?
- Understanding iCloud Storage Limits: iCloud offers free storage, but it's limited (usually 5GB). As your photo collection grows, you might reach that limit and experience storage constraints across your Apple devices. Deleting photos after uploading them to iCloud helps you stay within your storage limits and avoid potential restrictions.
- The Importance of Managing Storage: Think of your iCloud storage as a virtual attic. While it's fantastic for storing memories, letting it overflow can lead to sluggish performance and hinder the overall functionality of your devices. Regularly deleting unwanted photos ensures optimal performance and keeps your digital attic organized.
How to Delete Photos After Uploading to iCloud (MacBook)
Let's get down to business and learn how to delete photos on your MacBook after they've been uploaded to iCloud:
Step-by-Step Guide: Deleting Photos from Photos App
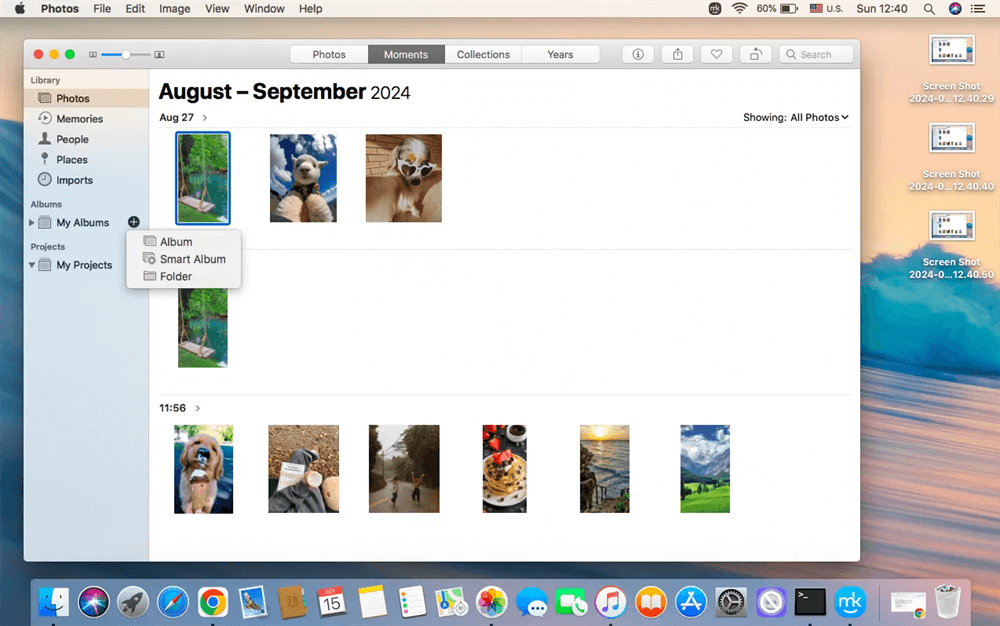
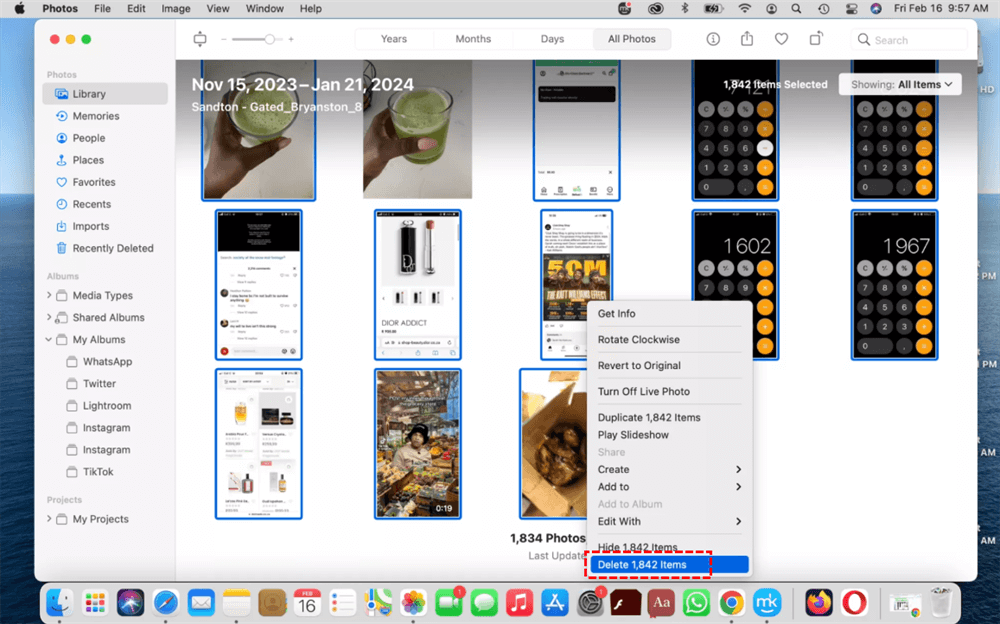
Step 1. Choosing Pictures for Erasure: Launch the Photos application on your MacBook. To locate the pictures you wish to remove, browse through your albums or the "All Photos" option. To choose multiple photographs, hold down the "Command" key after clicking on a single photo.
Step 2. Delete Pictures and Organize "Recently Deleted": After selecting the undesirable pictures, press the "Delete" key. There'll be a pop-up confirmation window. The pictures are erased from your MacBook permanently when you click "Delete". But for 30 days, they'll stay in the "Recently Deleted" folder so you can retrieve them if necessary. Go to the "Recently Deleted" folder and select "Delete All" to permanently remove them from iCloud.
Tips: Optimizing Storage with iCloud Photos Settings
- Download and Keep Originals: By default, iCloud Photos stores optimized versions of your photos on your MacBook to save space. However, if you prefer full-resolution originals, head over to Photos > Settings > iCloud. Then, choose "Download Originals to this Mac".
- Optimize Mac Storage: By automatically saving space-saving copies of your high-resolution images and videos on your MacBook and storing them in iCloud, this option helps you manage storage on your computer. To enable this, select "Optimize Mac Storage" under the "iCloud Photos" section in Photos > Settings > iCloud. This ensures your photos remain accessible on your MacBook while freeing up valuable local storage space.
Deleting Photos After Uploading from Other Devices (iPhone/iPad)
On your iPhone and iPad, the procedure for removing pictures after uploading them to iCloud is comparable:
Taking Pictures Out of the iPhone/iPad Photos App
Step 1: On your iPhone or iPad, open the Photos app.
Step 2: Find the pictures you wish to remove, then press to make your selections. To choose multiple photographs in a row, tap and hold on one, then swipe across.
Step 3: After making your selection, hit the "Delete" icon, which is typically a trash can in the lower right corner.
Step 4: There will be a pop-up confirmation window. To erase the pictures from your device, confirm deletion.
Step 5: These pictures will stay in the "Recently Deleted" folder for 30 days before being permanently removed, just like on the MacBook.
Remember: Deleting photos from your iPhone/iPad also removes them from other Apple devices linked to the same iCloud account, as long as iCloud Photos is enabled on those devices.
Important Considerations Before Deleting Photos
Before hitting that "Delete" button, here are some crucial points to consider:
- Accidental Deletion and "Recently Deleted" Folder: Mistakes happen! The "Recently Deleted" folder in the Photos app acts as a safety net for 30 days after you delete photos. This gives you ample time to recover any photos you might have accidentally deleted.
- Restoring Deleted Photos (Time Limits): Don't wait too long if you need to recover a deleted photo! Remember, the "Recently Deleted" folder only holds photos for 30 days. After that timeframe, they are permanently erased from iCloud and your devices.
Alternative Solutions for Managing Storage
Although removing images from iCloud is a fantastic method to make space, there are additional options to think about:
- Making Use of External Storage: Solid-state drives or external hard drives are good options for long-term storage of priceless memories (SSDs). These devices let you make a physical backup of your images off the cloud and have a sizable storage space.
- Making Room on Your Device: There are other methods to clear up space on your device besides photos. Examine choices such as removing unnecessary apps, deleting temporary files, and moving big files to cloud storage services like Google Drive or Dropbox.
Conclusion: Take Control of Your iCloud Storage
By understanding how to delete photos after uploading them to iCloud, you can reclaim valuable storage space on your devices without sacrificing your precious memories. Remember to strike a balance between storage management and preserving your photo library. Utilize iCloud Photos settings and explore alternative storage solutions to optimize your iCloud experience. Take control of your digital space and ensure your cherished photos remain accessible and safe!
Bonus Tip: Easy Way to Manage iCloud Data
Managing your iCloud data can often feel like navigating a maze—especially when you’re juggling multiple cloud services. Whether you’re looking to free up space, transfer files, or simply keep your digital life organized, having the right tools at your disposal is essential. Enter MultCloud, a powerful cloud management service designed to streamline the way you handle your iCloud data.
With MultCloud, you can effortlessly manage multiple cloud accounts in one place. It offers features like direct data transfers between different services, so you can move files from iCloud to Dropbox or Google Drive without the hassle of downloading and re-uploading.

- Cloud Transfer: Move one cloud data to another without downloading and re-uploading.
- Cloud Sync: Sync data across clouds seamlessly in real-time.
- Cloud Backup: Dynamically backup and restore files between clouds.
MultCloud Supports Clouds
-
Google Drive
-
Google Workspace
-
OneDrive
-
OneDrive for Business
-
SharePoint
-
Dropbox
-
Dropbox Business
-
MEGA
-
Google Photos
-
iCloud Photos
-
FTP
-
box
-
box for Business
-
pCloud
-
Baidu
-
Flickr
-
HiDrive
-
Yandex
-
NAS
-
WebDAV
-
MediaFire
-
iCloud Drive
-
WEB.DE
-
Evernote
-
Amazon S3
-
Wasabi
-
ownCloud
-
MySQL
-
Egnyte
-
Putio
-
ADrive
-
SugarSync
-
Backblaze
-
CloudMe
-
MyDrive
-
Cubby


